
My 3 year old is a typical boy and loves all building and construction related items. We have been fortunate enough to build a house in the last year much to his joy. At one stage I think his vocabulary solely consisted of 'digger', 'bulldozer' and 'tractor'. And 'no', he knew how to say 'no'...
As usual I asked him what sort of cake he would like for his birthday and a 'building' cake it was. I had a quick think of the various building or construction cakes I could make and settled on a quarry type design where trucks could ride up and down levels doing their thing.
Our sons Godfather (not the Italian type with horse heads lying about) is a civil engineer so I sent him cryptic messages over a number of days seeking his input on plant and equipment management at a quarry site.
After a few days of intrigue I finally let on that my questions were cake related. Poor guy, I think he was keen to sink his teeth into a big capex project ;)
To start with I made two cakes, a square and a circle using the following chocolate recipe:


Then I made the various textures for the cake:
- Grass: desiccated coconut with green food dye. I tried dripping the colouring into the coconut but this didn't work well so ended up mixing some dye into a little water then into the coconut which helped.
- Soil: Ripple biscuits in a plastic bag and lightly hammered with the back of an icecream scoop. I like the icecream scoop as it has a bit of weight but the smooth back won't break the bag where a hammer would. I hammered just enough that there was a fair amount of sandy soil and a number of larger rocks/boulders.
- Dust and rocks: Malteeser's hammered as above.
- Variation: I also hammered up some peanut butter Oreo's for a bit of variation but they weren't needed. Ended up using them anyway but it was overkill.


Once the cakes were baked I let them cool while I got the kids out the house for a few hours.

Then came the fun part for me - drawing diagrams. I love graphs, diagrams and any sort of visual planning :) Here is a sketch which allowed 3 levels of cake and no waste. The final cake had a few minor variations from the sketch.

Once I was happy with the sketch I made the required cuts to the cake and stacked the cake pieces on the plate to see how it looks:


Yup, looks OK. Lets move on.
Next step was to whip up some chocolate icing. Just grabbed the first recipe I could google. I used icing as the glue to hold the blocks together and placed a decent layer on the outside of the cake to stick the various toppings to.

(sorry, horribly out of focus - was in a rush)
At this stage I knew I had to work quickly as the icing was drying out fast and the topping still had to go on. It also coincided with 5pm so the kids were running amuck and it was time to go-go-go into the parenting 'hour of power' (food, bath and bed time). More like 2 hour of power...
I started with the grass and it was a bit hit and miss trying to stick it to the sides of the cake but it turned out OK-ish.

All in all it's a relatively simple and fun cake to make. Most importantly my 3 year old loved it and hopefully he will have a few memories of being involved in the planning and execution of the cake.
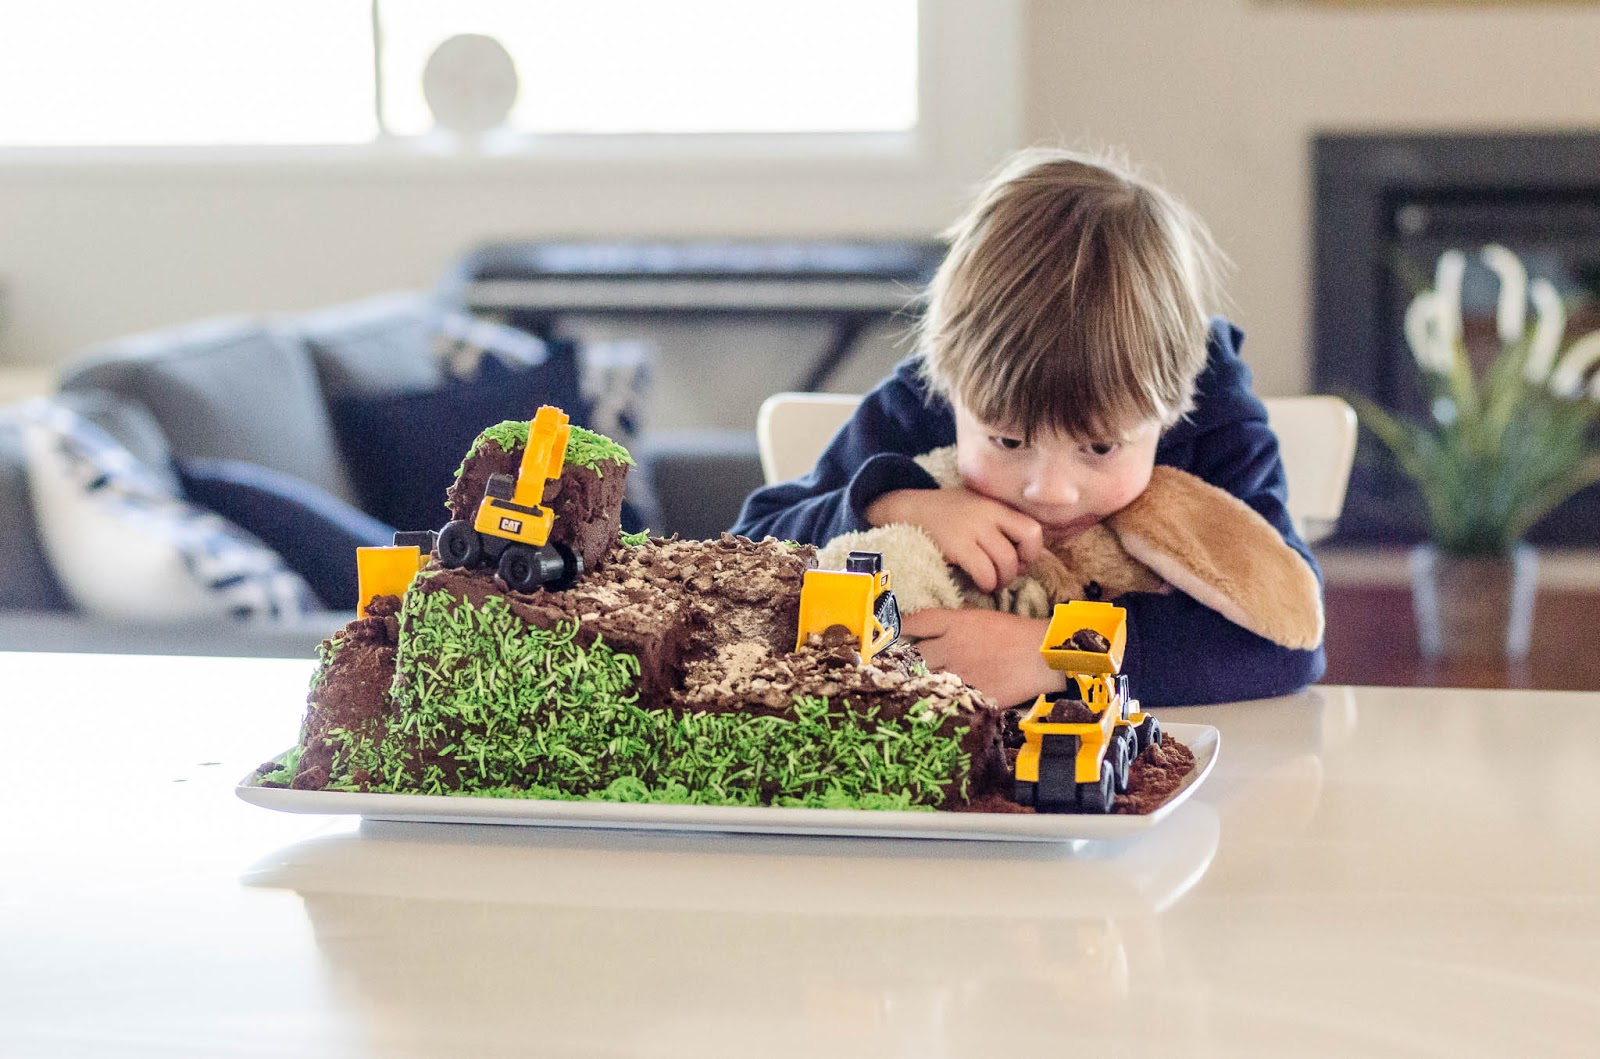
I really like this photo of him staring at the cake. He was describing what each machine was doing in the scene :)
Nice work. I dig it.
ReplyDeleteHaha, good pun. You receive Dad Joke approval.
Delete